The Product Sessions Blog
YOUR SPOT FOR ALL THINGS PRODUCT BUSINESS, FROM PRODUCT DEVELOPMENT TO MARKETING.
Hey There!
My name is Rebecca Waldron. I am a CEO and product development specialist. I love converting your business ideas into products that sell so you can live the entrepreneur life you love.
Listen to
the Podcast
Wanna know more?
Top Posts
WORK WITH ME
FREE Product
Launch Guide
What is a Tech Pack and Do I Need One For My Product Business
Today I’m talking about tech packs and answering all your burning questions. What is a tech pack or technical package? Why is a tech pack so important? Do you need a tech pack for your product idea? Can you make your own tech pack? Let’s get down to the nitty gritty!
Listen to This Episode Now:
Apple Podcasts | Stitcher | Google Play | Spotify | iHeartRadio
Search for episode 13!
What is a Tech Pack?
Essentially, a tech pack is a document that includes all the details of the product that you want to make. It’s a blueprint that explains everything like the colors, the measurements, the materials, etc.
Often people use the term tech pack, or spec pack, for fashion or accessory products. Basically, anything you would wear, you would use the term tech pack when you’re talking about having that manufactured. They also use the term tech pack for package designs like boxes, bags, or tags. You would also use the term tech pack for printing t-shirts. There are a lot of different types of products that require tech packs.
However, some products require more of a 3D design. So if it’s an engineering or machinery type of product, you would probably need to create something in a 3D design software to have that made. Like, my friend Hans from Tenikle. He designed his product in 3D design software before he had it made. He used injection molding and that was a different kind of beast. However, in general, a tech pack is usually what you’d use for product design instructions.
Do I need a Tech Pack?
Let’s say you have an idea for a product that you want to make. Do you really need a tech pack to have that made? My answer is most likely.
The only circumstance that you may not need a tech pack for is if you found a manufacturer that makes products that are really similar to your idea and not much needs to change. You could possibly just draw a simple picture and describe the changes you need to make from the product they already make, or a sample you have that just needs a couple of tweaks. In those cases, maybe you don’t need a tech pack.
A Tech Pack Will Save You Time & Money
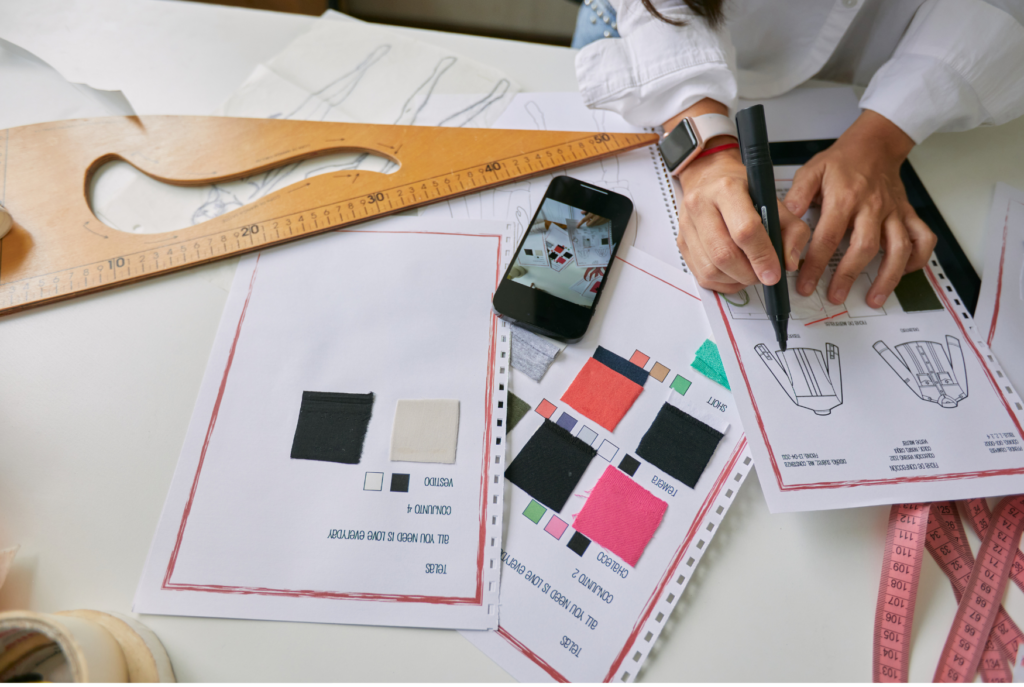
But in most cases, you’re going to want a tech pack. You may need to hire a technical designer to make one for you. The money you spend upfront will probably be somewhere between $200 and $1,000. However, having a professional tech pack will save you money in the end because the more information you give to your manufacturer to explain what you’re making, the less time and the fewer samples you’ll need to have made. Each sample is going to cost you money to have made and also to have shipped to you. So having a professional tech pack is really going to give you a more accurate prototype and more accurate bulk production.
Read More: Should I Hire a Technical Designer and Where Should I Look?
Additionally, when you first reach out to manufacturers to get price quotes and you have a detailed tech pack, their quotes will be more accurate. Let’s say you forget a few details on your tech pack and your manufacturer quotes you $20 per unit to make your bag design. Once you receive your first prototype, you realize you need to add a pocket or use a different material, which increases the cost. You might have chosen a more affordable or specialized manufacturer had they been able to quote you more accurately.
Can I make my own tech pack?
This list will help you decide whether or not you need to hire someone to help you with this. Depending on your skills, determination, and the complexity of your product design, you may be able to create this on your own.
If you are making this yourself you will need to use software like Adobe Illustrator. I used to teach Adobe Illustrator, so I’m very familiar with it. You could probably do something similar on Canva as well. If you’re familiar with Canva that would be a good place to start because it’s a little bit more beginner friendly.
The Basic Elements of a Tech Pack
Unfortunately, there is no standard format for a tech pack. Different brands use different terms and include various elements in their tech pack. But here are the basic elements that are generally included in tech packs.
Header
On every page of your tech pack, which will eventually be a PDF, you want to have a header at the top of every page. Just copy and paste it. Your header will include:
- Your brand name
- The style name or name of your product
- The date you finished or updated the tech pack
- The manufacturer’s name
- A short description, like “Trucker Hat” or “Diaper Bag”
- Style number or SKU number (if you use those)
- The season your style will be in like fall, holiday, spring, etc. (if applicable)
CAD Sheet
The first page of your tech pack will have what’s called a CAD. Sometimes people call the first page, the lead sheet or the description sheet. I just call it the CAD.
C.A.D. stands for Computer Aided Design. I draw mine in Illustrator. Sometimes I’ll pull a picture in of something similar that I like and kind of trace around it with the pen tool. If you are not familiar with Illustrator at all, you can try a hand drawing or utilize Canva’s draw tool. It should be a line drawing and should look as if the product is laying flat on the ground. It should not be stylized like someone’s wearing it. Don’t make it exaggerated; just make a simple line drawing.
And speaking of the word flat, another word for the C.A.D. is “flat” because it looks like it’s laying flat on the ground. Sometimes they also call this the sketch.
Colorway Sheet
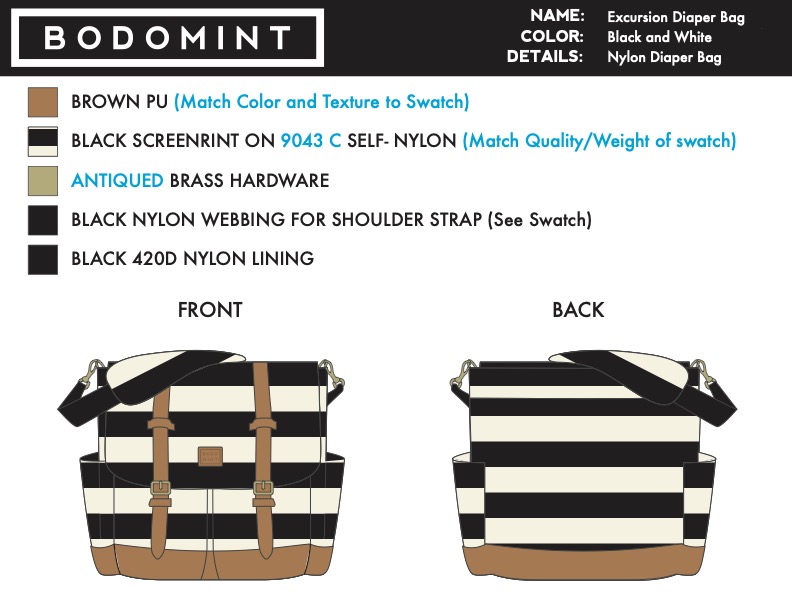
The rest of these elements in a tech pack aren’t always in the same order. So I’m just going to go through them the way that I make my tech packs, but they don’t always need to be in this order. The next element is called the colorway sheet. This is going to show that same CAD drawing, but in the different colors you want to have made, if you’re going to have more than one.
You will reference the Pantone color number here. Pantone colors are a standard color matching system that manufacturers use all over the globe. This way, when you say you want light pink 209 C, the manufacturer knows exactly what shade of light pink you want.
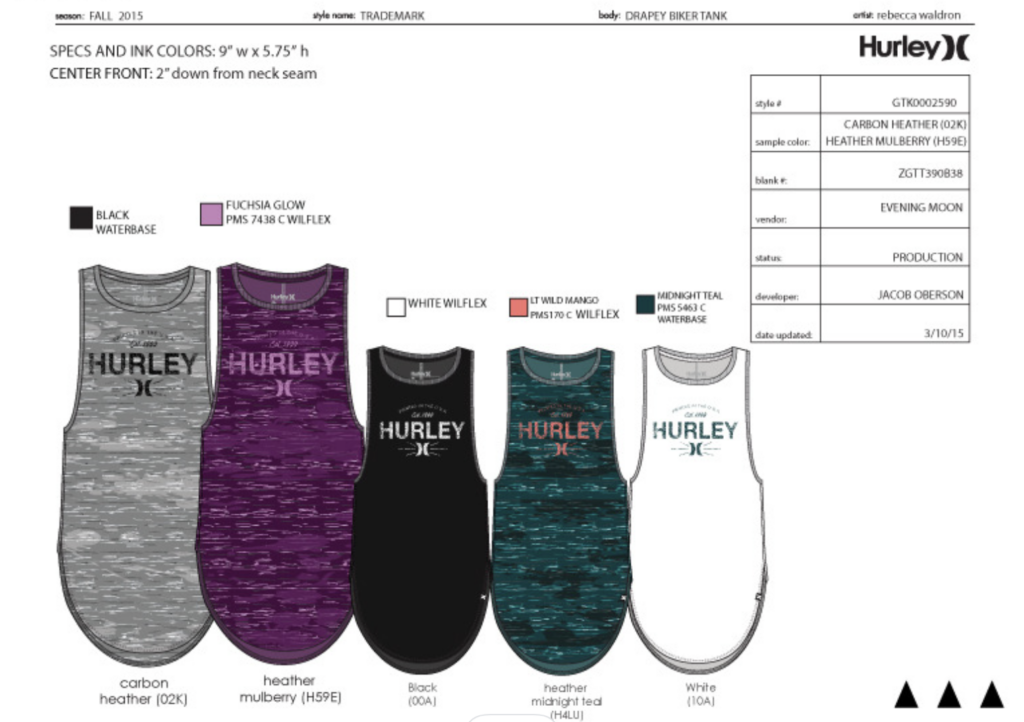
For t-shirts, you would call out the Pantone color number for each ink color you’re going to be using when you print that t-shirt.
Call Out Sheet
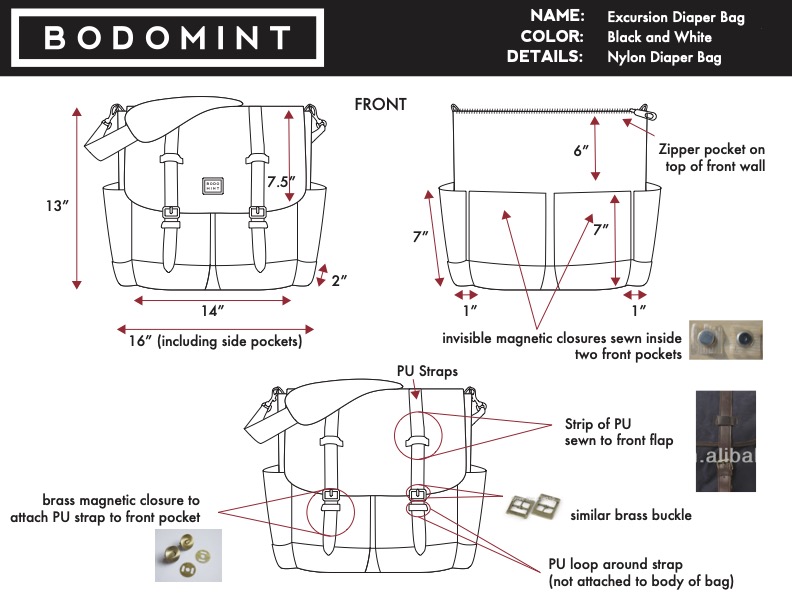
I call this the call-out sheet, some people call it the construction details. Essentially, it shows that CAD, except you will now have arrows pointing to different parts of your product and “calling out” all the details. Call out all the details like the type of pocket, collar, zipper, hardware, mesh, silhouette, stitch type, embellishment, or basically anything that you can describe.
If something needs more explanation, you can show a bigger version of that portion of the drawing to show more detail. You can include photos of examples, like a specific zipper you like from another product.
Along with your tech pack, you may also mail physical samples that use techniques or details that you like. You should reference that sample here in the call-out portion of the tech pack saying, “Please reference sample”.
Spec Sheet
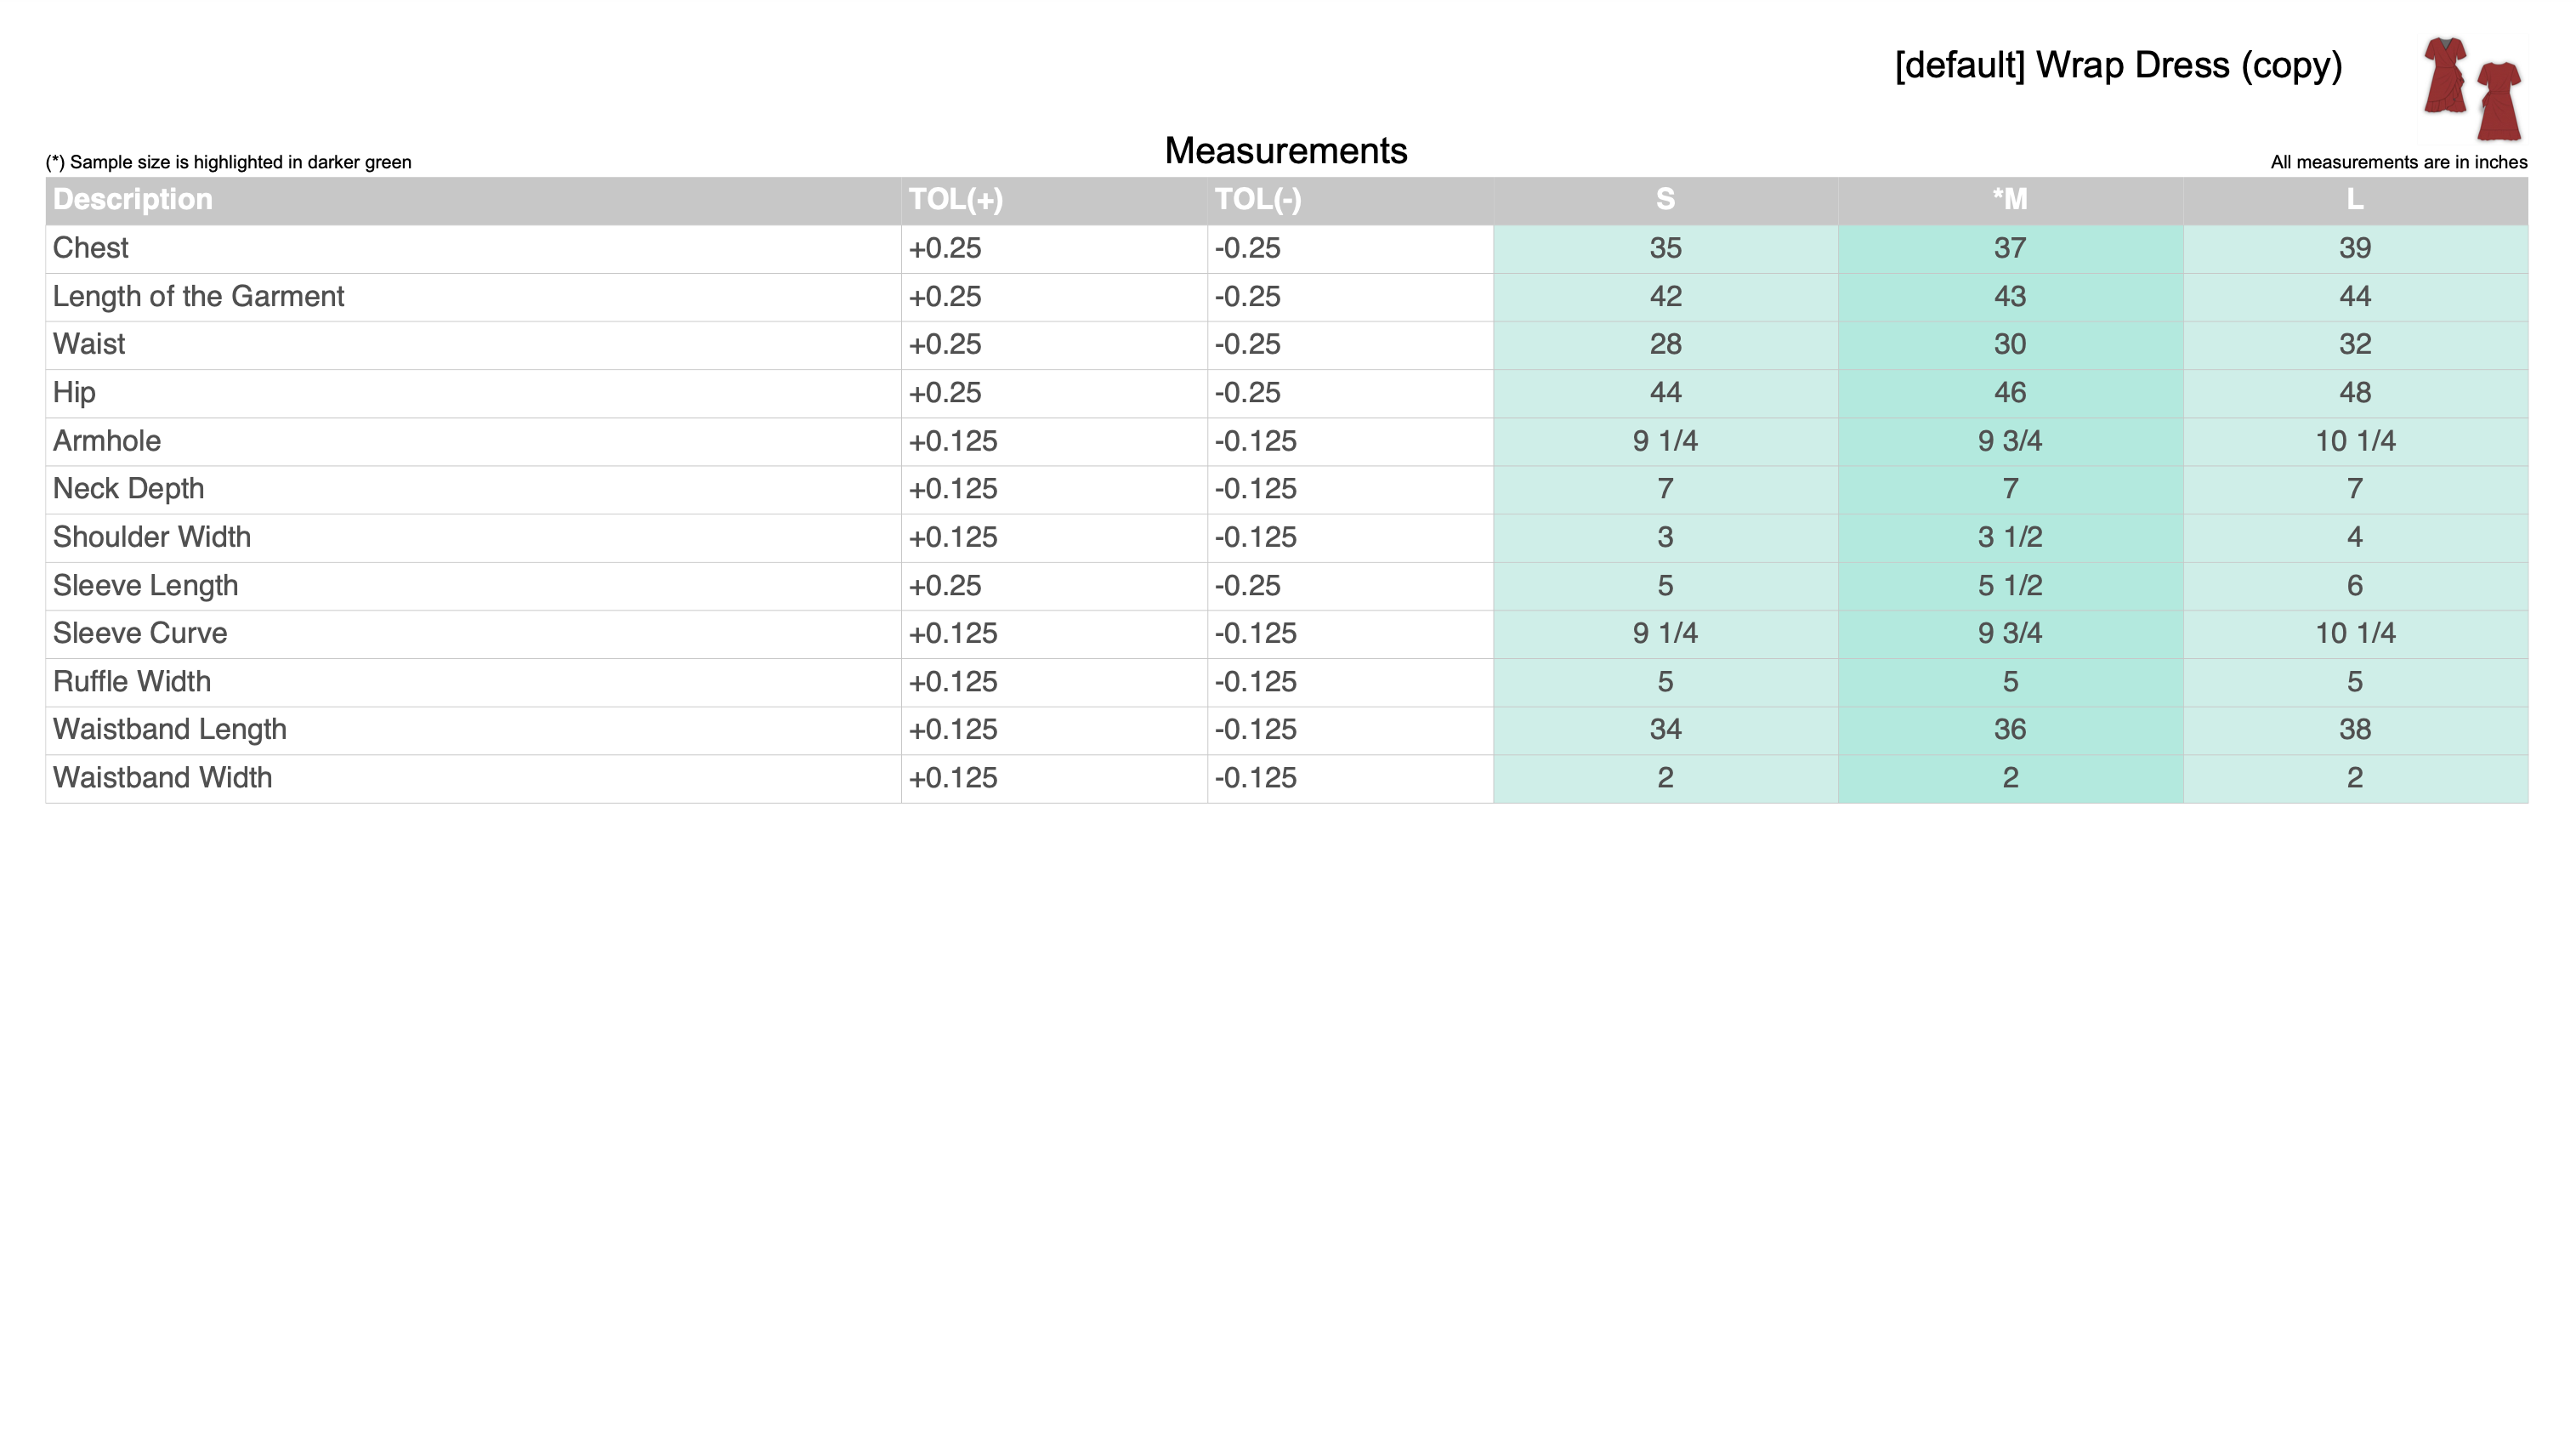
On the spec sheet, or the measurement sheet, you specify all of the measurements of your product. For example, if I was making a handbag I would draw a line across the width of the bag and list the measurement there in inches. I would also list the dimensions for the height, depth, handle length, etc.
If I was making some type of garment, I would definitely need to hire a technical designer to help me with this portion of the tech pack. Measurements of a garment are what make it unique. The way a shirt fits or pants fit is unique to a brand so you want the fit measurements to be specific. A Technical Designer is a professional at that.
Ideally at this stage, you may have a mockup sample or an example that you purchase from the store with the fit that you like. A Technical Designer specializes in documenting the key measurements for that and can also do the size grading for you. For example, say you have a sample that is a size medium. A Technical Designer will document the key measurements for the small, extra small, large, and extra large etc. These measurements will be listed in a table format, kind of like in Excel.
PLM Software
When I worked for larger fashion companies, there was software where we would input a lot of this information. The software is called PLM software or “Product Lifecycle Management” software. There are so many different versions of it. I used to use one called Full Circle, but I’m pretty sure it’s changed names now. When I worked for Nike, SAP had its own PLM type of software. A lot of people also just use Excel. You would upload your PDF tech pack to this software but also manually type in all of the measurement details and other information.
Bill of Materials or B.O.M.
The next element of a tech pack is called the Bill of Materials. It’s also known by the nickname B.O.M. The BOM is a list of everything that’s going to be put into the garment, the quantity, where it’s placed, and the color. So it’s in an Excel-type format or a data table.
You’re going to list things like:
- The “Self” fabric. Self is a term for the most used fabric of the garment or the main fabric. So you would list Self, 100% cotton, white
- Contrast fabric, sleeve, 100% cotton, black
- YKK Zipper, center front, antique brass
- Hang tag
- Buttons
- Any packaging, like if it’s going to come in a polybag
- Special care label
- Threads. A handy term here is D.T.M. or dye to match. If you want your thread color to match your fabric color. If you want the thread to be contrasted, then you’ll list the thread Pantone color.
Trim Suppliers
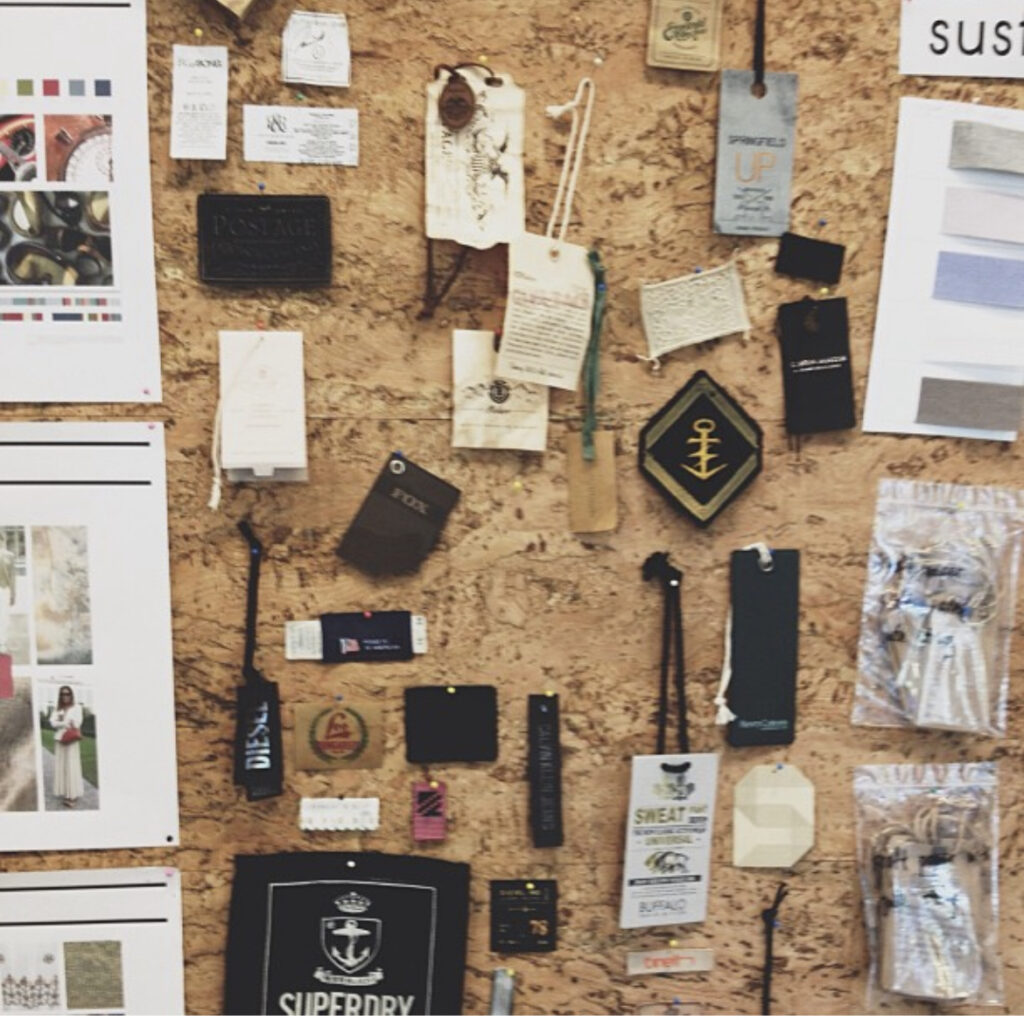
Many brands will use 3rd party trim and packaging suppliers. Two I have used before are Brand ID and Zabin Group. When you have multiple products made by different manufacturers, using this type of supplier ensures that all your hangtags or custom buttons match and be cohesive across your assortment. In your Bill of Materials, you will list the name of that trim supplier, the name of the trim, and the specific ID number that’s associated with it. Your manufacturer will order those items from your trim supplier.
Art to Size
The last element of a tech pack is the “art to size” or the “actual size art”. Say you have a logo that’s going to be heat-stamped onto your bag design, or you are screen printing a t-shirt, or you have an all-over printed textile. You have to provide the finalized artwork that is actually the size it will be on the final product. If you want the logo to be four inches wide on your purse, then you will make the artwork four inches wide in the tech pack.
If the artwork’s going to be bigger than the standard 8.5″ x 11″ document size, send it as a separate file along with the tech pack. This is usually a .tiff, .psd, or .ai file. Be sure that it’s high enough resolution to be printed without being pixelated or blurry. If you use vector art, like art created in Illustrator, it can’t be blurry. But if it’s pixel art, like art made in Photoshop, then you have to make sure it’s high res.
Simplify if Needed
After going through all of these, I realized that the tech packs I’ve made for corporate brands had more of these elements and the tech packs that I made for my small business were less detailed. For example, I don’t have a Bill of Materials for any of Bodomint‘s tech packs. I think small businesses that are just starting out can leave out the Bill of Materials unless it’s a complex garment or the manufacturer requests it. I also combined my CAD Sheet and Colorway Sheet, as well as my Call-out Sheet and my Spec/Measurement Sheet. They were more simplified tech packs.
Conclusion
Tech packs are one of those things that are not very exciting to talk about, but it’s necessary for your product vision to be a reality. So in that way, it is kind of exciting because it’s making your idea real.
I hope this answered some questions for you. If you’re hoping to have your product made and this seems like something that you can make yourself using Canva or Illustrator, then awesome! If that’s not possible for you, definitely reach out to have a technical designer help you make that happen. Some places to find a technical designer include, Fiverr, Upwork, and LinkedIn.
As I mentioned, the more detailed and accurate your tech pack is the happier you’re going to be when you receive that first prototype from your manufacturer.
Work With Me
Want to hire me to make your tech pack? I’d love to help! I specialize in accessories like bags, hats, belts, and wallets, as well as t-shirt printing. Check out my Work With Me page to see pricing and submit your request. I’ll reply within 2 business days!
Links Mentioned
Learn more about 3D design with Hans from Tenikle
Read: Should I Hire a Technical Designer and Where Should I Look?
Software used to create a tech pack: Adobe Illustrator and Canva
Global color matching system: Pantone
Trim Suppliers: Brand ID and Zabin Group
My Brand: Bodomint
Where to look for a Technical Designer: Fiverr, Upwork, and LinkedIn
Or Hire Me!: Work With Me
Leave a Reply Cancel reply
Hey There!
My name is Rebecca Waldron. I am a CEO and product development specialist. I love converting your business ideas into products that sell so you can live the entrepreneur life you love.